Wednesday, February 29, 2012

Tuesday, February 28, 2012

Albums, Albums and More Albums

This past weekend and this week, I've been working on lots of Name and Word Albums! I have four Custom Name Albums on order and I also need to get inventory built up for my up-coming Spring shows. The albums are starting to take over my craft room...and part of the living room too!
Here is one on my craft table cut to size, covered in cardstock and ready for the patterned paper to be applied.
Here is a stack with the patterned paper already on them ready to be cut.
And this stack has been cut and just needs bound and decorated.
These here have been cut, but need cleaned. Then they can also be bound and decorated.
~~~~~~
What taking over your craft room right now?

Sunday, February 26, 2012

Treasury Thanks

This week was a much busier week in the treasury world than last week! I was featured in 6 great treasuries this past week! Help me thank my curators by checking out their treasuries and shops!
~~~~~~
Deb of StoryBeader featured my Disney Autograph Photo Album in her What's black and white and red all over? Treasury! Deb makes fun Art Journals like this Pink One that are just dying to be filled!
Kym of FabricFascination featured my Custom Baby Name Album in her A Little Something for Everybody Treasury! I love these Awesome Fabrics from Kym's shop!
Duni of PeriDotbyDuni featured my Engraved Baby Album in her Sweet Pastels Treasury! These Beautiful Pajamas from Duni's shop look so pretty and comfy!
Erika of ArtfulRising featured my Custom Baby Name Album in her Sunshine on my Shoulder Treasury! Of course my favorite from Erika's shop is this awesome Art Journal!
Linda of lindab142 featured my Personalized Wine Glasses in her A Few Favorites for Oscar Weekend Treasury! These Beautiful Earrings from Linda's shop would also be great for Oscar weekend!
Spring whispers through the snow Treasury! This Purple Headwarmer from her shop is so striking!
Thanks again to each curator for featuring my work! You put a smile on my face this week :)

Friday, February 24, 2012

Friday Features - Staycation

Last weekend, Jesse and I had a nice long weekend...at home! It was perfect! They offered some extra vacation at work, so we jumped on it and took both Friday and Monday off! We had a little staycation and enjoyed some quiet time at home and got lots of work done too!
Today's features are inspired by my idea of a perfect staycation and how we spent our weekend :)
Pizza, Movies and Wine pretty much sum it up :)
(oh how I wish my laser could cut metal...this whole shop is great!)
~~~~~~
What's your idea of a perfect Staycation?

Thursday, February 23, 2012

Let's Do a Jig

Wanna do a jig with me? No, not the Irish dancing kind! What kind you ask then? One that will make lasering more efficient!!!

~~~~~~

A jig is a template that allows me to laser several objects at once and line them up in the exact same spot each time. This is nice for small objects. They may only take 20 seconds to laser, but then I stand there feeding the laser all day. This way I can be more efficient...and multi-task more :)
This need for a jig came when I bought some new wine bottle stoppers. This style already has the cork attached making them impossible to laser free-standing. I starting by cutting 12 holes in a piece of wood the size of the cork. I then built legs using the left over circles to raise the jig so the corks would be off the table and flat on the board. I thought I was pretty slick for reusing the cut circles :) Until I tried to use the jig and it wouldn't line up in "home position" inside the laser!
As you can see from this photo, there are two rulers on the top and left sides where I line up my work so it is in "home position". By adding the legs, I was only able to eyeball it and hope I was lined up...not good. So I added the second board on the bottom of the jig so I could line it up. Several calculations later...and I had a working jig!
Here you can see the bottle stoppers in the jig from the top and how they hang through on the bottom.
After I created my first jig, I thought of other items a jig would be handy for! I made two more for my magnets and pendants. These jigs started with the same basic concept...cut a bunch of holes in 1" and 1.5" diameters to match the sizes of my items. Since I didn't have to raise this jig off the table...it was super easy.
I just drop the wood blanks in...and out comes several beautiful magnets and pendants :) I love that these jigs allow me to get so much more done!
What have you created lately that makes your work easier?

Tuesday, February 21, 2012

Photography - A Work In Progress

Photography is one thing I've struggled with since opening my Etsy shop over 4 years ago. My photos have definitely gotten better since the first ones I uploaded! But with each new product comes new struggles it seems.
Photo courtesy of Wake Photography
Since I started selling glass items, I've run into a whole new territory for photography. My friend Melanie at Wake Photography was nice enough to come take photos for me to upload my first glass items to Etsy. She did an awesome job and I wish I had her here all the time to take more pictures! But I like to take photos as I make items and sometimes I'll take photos of custom orders before I ship them, so I don't have the option to wait for the photos to be taken. So it's time I started learning on my own!
My backdrop was the first thing that had to change. I usually take my photos on a white background, but that's just not an option with glass. I found that black worked about the best and all I had on hand at the time was a black table cloth. It worked, but it wasn't the greatest. (Of course Melanie made it look awesome!) So the other day I purchased sheets of black poster paper to lay inside my light box. After I finally got it cut to size, it worked pretty well!
I had tons of glasses that needed photographed, so away I went. Lighting and reflections are still something I'm working on, but I'm really happy with the way these new photos turned out. I know I'll never be as good as Mel, but I'm hoping to get photos good enough to put in my shop.
What do you think of my new glass photos? Please be honest and tell me if you think these are good enough to go in my shop and what your reaction would be if you saw them on Etsy. I've already added a few and I hope they'll get some views :)

Monday, February 20, 2012

Home Decor - Wall Words

After I showed this Welcome sign in my Wordless Wednesday post a couple of weeks ago, I got lots of great comments on it! I made this sign shortly after getting my laser last year with plans to offer these in my shop. Somewhere along the lines they got pushed to the wayside and I never got back to them.
~~~~~~
Well, after the wonderful Sharla of BeadedTail ordered a custom Wall Word...it was time to get back to these! Check out the fun design I made for her :) I love the two colors together!
I thought these would also be fun to sell in sets, so I started cutting and painting and deciding which words I wanted to start with. I decided to make two sets for our home first to play around with different ways to hang them as well. Here are the two I've made so far:
The pink and purple set hangs above my computer desk and the red and black set hangs above a walkway in our living room that splits to our two bedrooms and the bathroom.
I love how simple these are, yet add so much color and life to a space! Now I just have to decide which ones to start adding to my shop!
What would you like to see?

Sunday, February 19, 2012

Treasury Thanks

This week only brought one treasury feature...but what an awesome treasury it is!
And coincidentally, I sold 2 sets of wine glasses this week!
Margaret of AppleAnnieBaby featured my Personalized Wine Glasses in her All You Need Is Love Treasury!
Margaret's shop is full of adorable baby items! I'm in love with this Zebra Print Bib!

Saturday, February 18, 2012

How To Make an Animated Blog Button

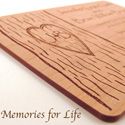
Have you noticed my fancy new Blinky Blog Button I added to my blog recently :)
I've been wanting to learn how to make one of these for quite some time, and once I did my research, I found they're quite easy to make! I thought I'd share my new found info and how I changed the html code a bit to fit my needs.
The site I used was Picasion and they make it so easy for you to create your code! Just upload the photos you want included in the animation, choose your size and speed and click Create Animation. How easy is that!
You can leave your code as is and it will work fine. I wanted mine to look a little different, so I played with the code a bit to customize mine.
Here is the original code:
http://www.blogger.com/%3Ca" title="how to make gif">http://i.picasion.com/pic49/08fe8f98b563f5e26bbf4b029e8fba20.gif" width="125" height="125" border="0" alt="how to make gif" /> http://www.blogger.com/%3Ca to make gif
~~~~~~
And here is my customized code:

Memories for Life

http://www.blogger.com/%3Ca" title="Memories for Life">http://i.picasion.com/pic49/08fe8f98b563f5e26bbf4b029e8fba20.gif" width="125" height="125" border="0" alt="Memories for Life" /> http://memoriesforlifesb.etsy.com/%22%3E%3E
~~~~~~~
I just played around with the code and uploaded it to my blog until it was right.
The main things I changed:
*I changed the web address after both of the href=. I wanted my button to direct people to my website, not picasion's.
*After title= and alt=, I changed these from "how to make gif" to my website name "Memories for Life". Now when you hover over the button, you see my title and not theirs.
Another thing you could change is the size. Where the numbers "125" are located, you can change these to any size you want to fit your side bars. After seeing this in the code above, I was able to fix one of my other buttons that I never could get to fit in my sidebar...problem solved :)
~~~~~~
I hope this was easy to follow and you found it useful :) Leave any questions in the comments and I'll answer them as best I can.

Friday, February 17, 2012

Friday Features - Charlie

If you read my post yesterday, you saw that we got a new member in our extended family :) A furry little "nephew" named Charlie :) He's absolutely adorable and full of energy! He's so fun to watch romp around in the snow!
~~~~~~
So today I went searching on Etsy to find fun Harlequin Great Dane items...check out my finds!
by

Thursday, February 16, 2012

Harley Meets Charlie

Jesse's brother and his girlfriend got a new puppy and Harley got to meet him for the first time yesterday :) Charlie is a Great Dane and is only 8 weeks old...he's already bigger than Harley who just turned 6 last week!
Harley wasn't quite sure what to think of Charlie! Harley is used to being the "big dog" around here. Of course he's the only dog around here and chases the cats around all day, so he thinks he's 7 feet tall...LOL :)
Charlie wanted to play and pounced around while Harley ran circles...it was so funny and so cute!
Charlie sure is a cutie! But look at those paws! These two won't get to play together much longer! Charlie's feet will be bigger than Harley!

Wednesday, February 15, 2012

Almost Wordless Wednesday - Winter

Outside
Inside
I think I'll stay inside :)

Tuesday, February 14, 2012

February Challenge - A Month of Love

This month, I am the challenge leader for the Blogging Business Artisans and I chose the theme Month of Love! And what better day to blog about it than Valentine's Day :)
I had the perfect piece I wanted to make for this challenge! I've been wanting to try my hand at converting scroll saw patterns into patterns I can use for my laser. I came across this awesome heart pattern a while back and knew it was the perfect time to use it!
I loved learning how to make this into a pattern that I could use for my laser! It was a new learning experience for me and one that I can use over and over with several designs in the future! And the best part was, I got two designs in one with out even realizing it :) When I got the original heart all cut out...there was a little heart shape left from the inside of the heart.
I made this into brooch/pin. I engraved the word love on it and added the pin to the back!
Something else that was new for me this month was jewelry making. Sure I've made some simple pendants before, but I bought some new tools and attached a jump ring to the pendant, added the chain and added the clasp to the chain all by hand. It's a very small start, but it was fun to practice something new. I have other ideas for wooden jewelry and this will help me get started!
Check out some of the other fun heart projects I did this month:
Related Posts Plugin for WordPress, Blogger...